Walkthrough
[ January 16th, 2009 | ]
Hi!
Because of my absence last time, I want to show You a walk through the Application as a part of my detailed concept:
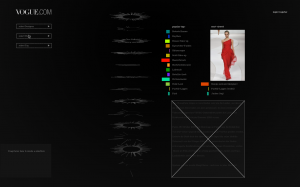
startscreen
The startcreen shows the quick search and a logo (yet a placeholder) in the top left corner.
In the middle we see the so called HELIX. This are the seasons aligned from top to bottom.
If we are very undetermined we can choose something from those suggestions on the right.
The labeling for the seasons is still missing. ![]()
I want to show You the determined way first, followed by the ambler’s.
So, lets say we search for a model named Natalie Keyser and we want to use the quick search.
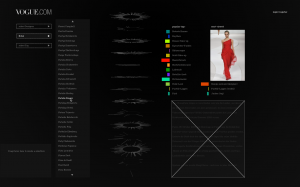
quick search
After clicking select model a cursor starts blinking and the appropriate list opens.
Now we start typing Natal… , the list moves to the right position and we can click on Natalie Keyser.
quick search output
This result shows several things:
# There are two images containing Natalie Keyser.
# A thumbnail list that can be sorted an scrolled.
# The images are connected with a LINE whose color is the same as the little bar’s on the left sided list item. With a click on the [-] the item is deleted from the list.
# We see their seasons (no labeling yet).
# A graph at the right border indicates the fashion labels. This indicator is the same data as the circular bars in the middle. Hovering/clicking the the alphabetical rows is a quick alternative to the selection of a fashion label in the center.
Hover images
Now we can explore the images by hovering the red quads or thumbnails. With a click on one of them the detailed view opens up. Here, in the overview, there is allways either the thumbnail list or the detailed view. Clicking outside the detailed view the thumbnails return.
Now, let’s leave this way and explore the database like an ambler:
Very important for the whole navigation is the space bar. By pressing it you can switch between this overview and a closeup.
close up
Here we have a closer look to one season (that will be labeled in the back). Natalie Keyser stands still there on the left side, but is not in our viewport now. We can change the seasons with the mousewheel and rotate the whole HELIX by dragging the mouse.
select label
Now, we want to open a label and either just click one or select one from the right sided graph.
progress bar
I decided to have a progress bar at this point to preload all the images. This may take a while, but once finished we can smoothly navigate through the images. The bar we selected opens so we can see all the single images in this label, represented by white quads.
hover
Hovering the quads will open up an overlay showing us the image and its meta data.
lines
After clicking one quad, its meta data appears in the left sided list and we see the connection lines.
The lines stay until we select a new image. So do the list items, too. But (clicking on the little [+]) we can let some of the list items and corresponding lines stay sticky. A [-] removes them.
Every quad is now hoverable. The white ones from the opened label and the related (red) ones.
Now, we can browse related images by following the lines.
Or we press space and go to the overview:
overview
Entering the overview mode offers more details and possibilities:
click on a thumbnail
clicking a thumbnail, what is the same as clicking a (red) quad, opens up the detailed view for an image:
detail
The enlarged image shows up, offering us his metadata, while its corresponding (red) quad pulsates (what we can’t see in this screenshot).
Again several options:
# Below the image we see its meta data that can be added to the left item list by clicking the [+].
# Clicking one of the [*] shows a highlight on the season/label.
# There’s an additional info text (catwalk report?) and we can add tags to this image that are available for all users.
# Mark as favourites will add a personal tag (only available for current user) thats behaves like any other metadata.
# The slideshow button will play all the images selected by any line.
But we can refine it:
Dragging some list items in the lower left corner creates a selection:
selection
As we see, there are only 15 images selected. The unselected lines stay but are semitransparent. These selections are saveable, too. Once saved, they appear in the item list (left) and behave like the other items.
…so far … the rest is obvious, i think.
I hope you could have followed my thoughts, if not, please let me know.
It would be GREAT to see some COMMENTS, containing critics or annotations, here.
thanks,
sebl
p.s.: there are some errors in continuity ![]()


Leave a Reply
You must be logged in to post a comment.